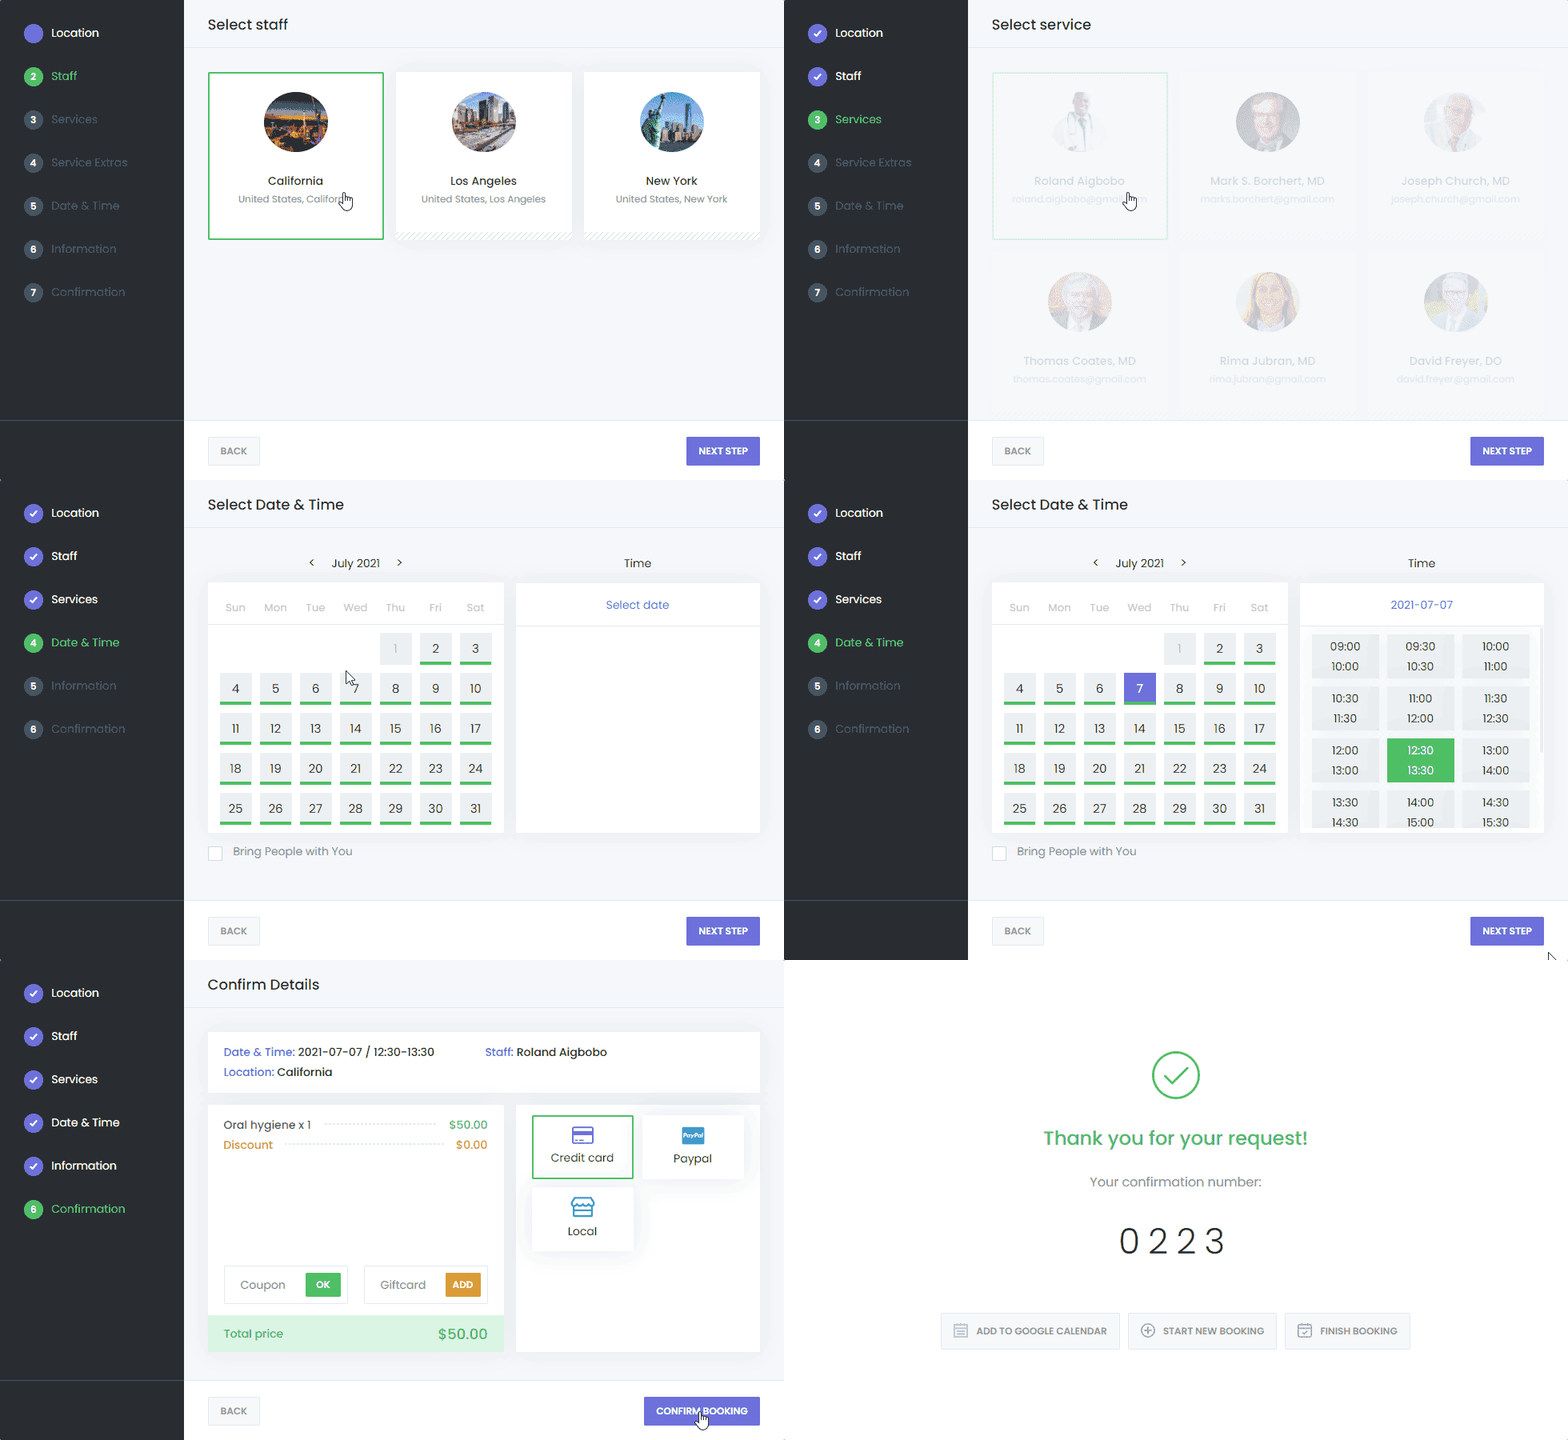
After you login, this the default first look of your appointment panel. Now you need to configure it.

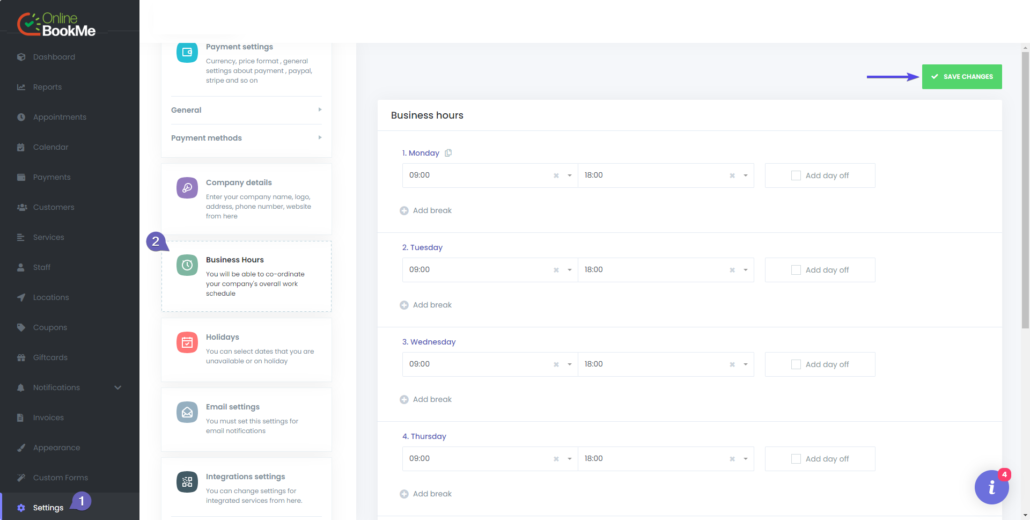
In order for your Booking panel to start doing its job, you need to set Working Hours, Location, and Staff. Let’s start with working hours first. In our solution, you can set working hours suitable for each service and staff. You can also set general working hours. To do this, we go to Settings -> Business Hours tab.
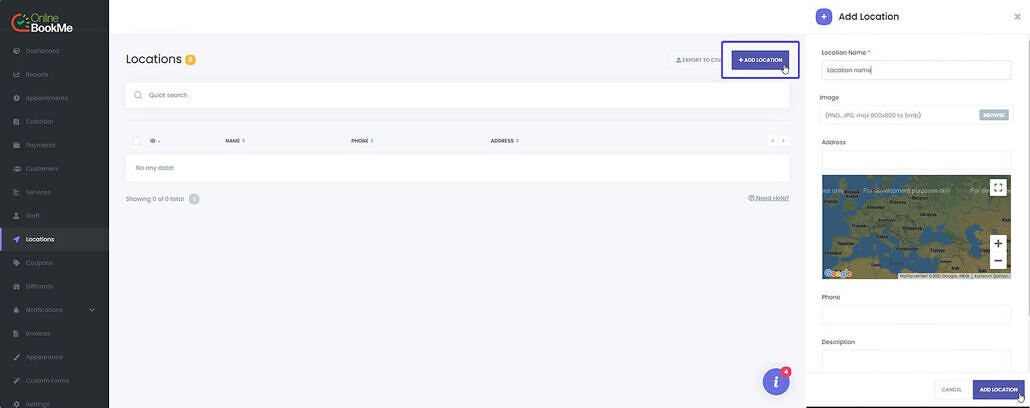
Then you need to go to the Location tab and add a new location for your service.
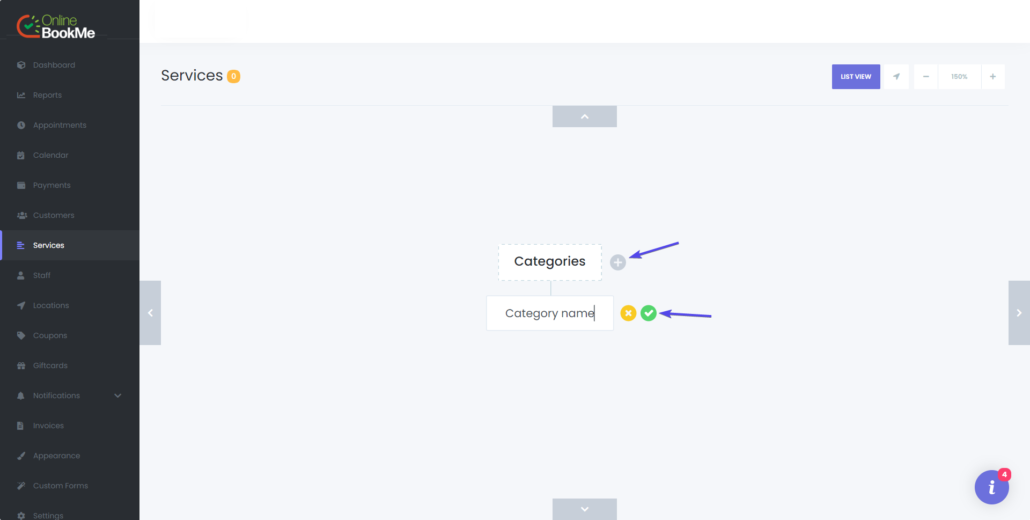
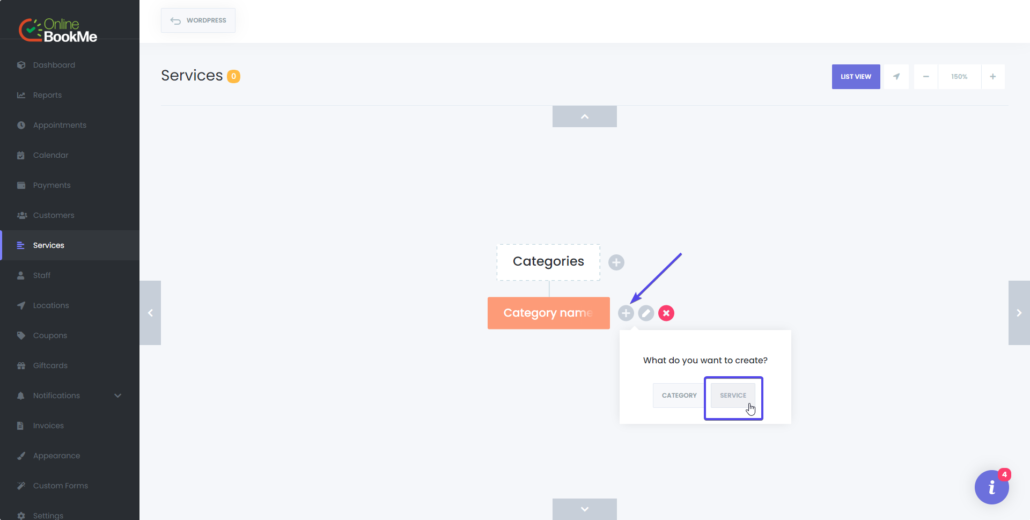
The next step you need to do after adding a location is to add a new service. To do this, you need to go to the Services tab and first create a category and add a new service to that category.
After adding a category, the next step is to create a new service under this category.
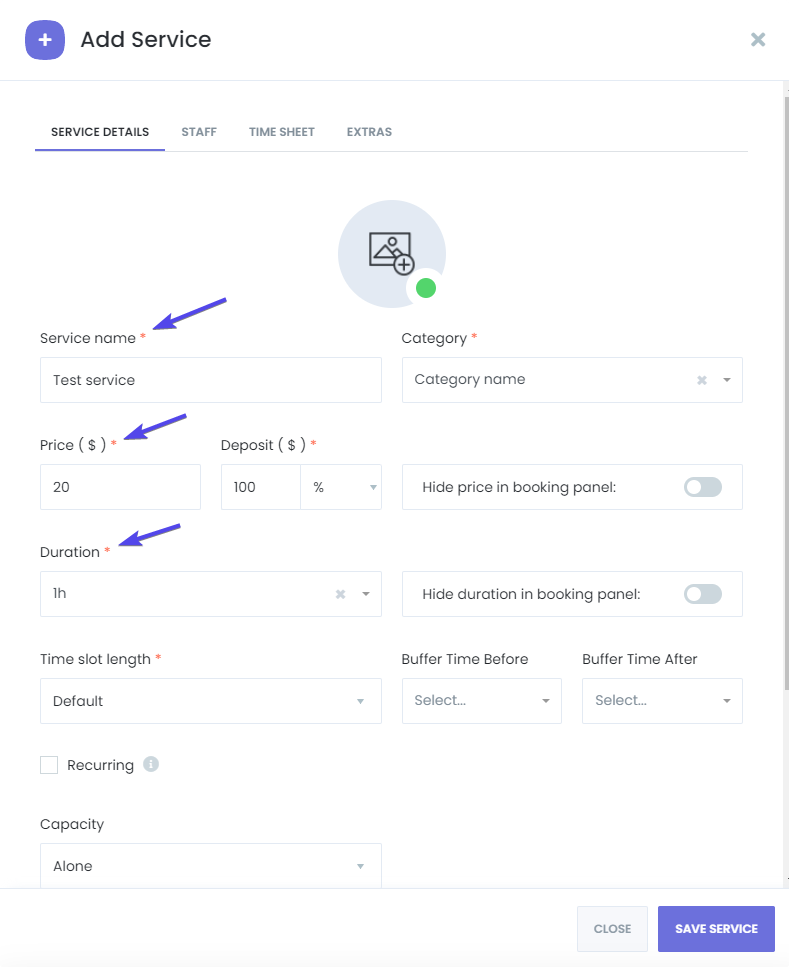
Service name, price, and duration are important when adding a service.
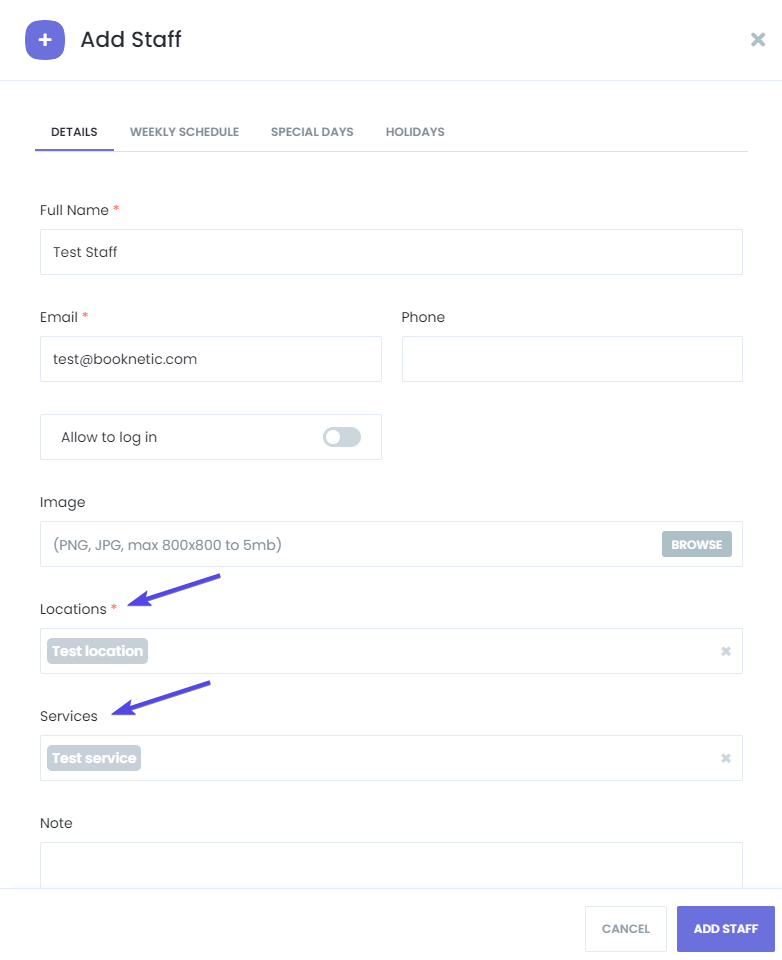
After successfully adding the service, all that remains is to add a Staff. For this, you need to go to the Staff tab and add a new Staff. When adding Staff, you must assign this Staff to the location and service you created.
Everything is ready! Booking panel is ready for you to use and is waiting for your orders!
